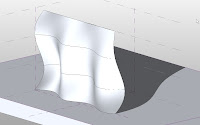
Continuing on from my last entry, i wanted to push the idea further. A simple straight truss is pretty easy, but what about arched, triangular trusses? This is where the fun really started.
First i made some adjustments to the panel pattern i was using. I connected the reference points of the grid using the "Connect Points with Curve" command.
Using the right command is important because otherwise it won't properly generate the form downstream. i then linked the visibility of these lines to the visibility of the different forms of the truss frame.
Then i created a rig in the conceptual mass editor. An arc controls the overall geometry while some triangles nested at the ends and center generate the desired form of the truss.
Generating the truss form, i then pick and divide the individual surfaces, applying my Truss Panel Pattern
Once all the surfaces have had the panel applied, I have to pick each panel and setup the sides which are on and off. A bit tedious, but you can apply to several similar panels concurrently.
So with this done, we can cycle through a bunch of different sizes pretty quickly.
And this what i like best....I can export one of these trusses to DWG format. when i open it up in ACAD, I get this:
Because i implanted the model lines within the Panel Pattern family, with a little bit of creative deleting, I can have this:
A nice wire frame i can give to the engineers so they can analyze my truss quicker, with less guess work! Collaboration at its finest!
download the arch truss family here:
Panelized Arch Truss.rfa
Lastly, a shameless plug.....
Come see me, THE BIM TROUBLEMAKER, at AU 2010. Myself and 2 other VERY talented and experienced Revit users will be presenting the course:
FUZZY MATH ESSENTIALS FOR REVIT FAMILY BUILDERS
Course number AB327-4 Wedensday after lunch
If you aspire to be a family building bad-ass, don't miss this class....seriously!
When David B. from Do U Revit taught this course in 2008, he turned me into the troublemaker I am. Hope to see YOU there!


